Category Archives: Drawing

The Design Table feature was empty…!!

Are you getting this message while opening files in SolidWorks SW2011 SP 4.0


As per Chris Brooking

We’ve identified some issues whereby corrupt DT nodes were preventing users from creating new Design Tables – and the ’empty’ nodes could not be deleted.  In SP04, we added code to delete the corrupt empty nodes from the file, to allow you to create a working DT again.

We’ve identified several issues related to this – the file is not marked as dirty, and there’s no way to say ‘don’t warn me again’ to the message – we plan to address these issues in SP05.

And if you’re looking for a way to fix the error, the solution is to insert and delete the DESIGN TABLE in every single file showing this issue.

If you’re looking for an automated way to fix it try the Insert and Delete Design Table* macro.

 Here is how to use it:

  1. Extract the file on the desktop of known location.
  2. Open the assembly/part file in SolidWorks and go to Tools > Macro > Run
  3. Browse to this macro file.
  4. Go for a coffee break and in the mean time macro will fix your files.

DISCLAIMER: This macros will change the current SolidWorks document. Use the macros at your own risk. Back up your data before using this macro on any SolidWorks document.

*P.S.: This  macro currently work on active file only. In case you need to do a batch operation, please leave a comment here and I’ll update the macro to do the batch file fixing.

DraftSight™ 1 2 3 and Go!

Just follow three steps to enjoy your DraftSight™ 

Step 1. Download 

Choose your Operating System from the options listed below

Step 2. Activate

Save or print a file and enter your email address

Step 3. Confirm

Click the confirmation link when you receive your activation confirmation email

DraftSight™ is a free* 2D CAD product that lets you create, edit and view your drawing files in Windows®, Mac®, and Linux®.

*Standalone license. Activation required.

DraftSight™ celebrates 1 MILLION downloads!

DraftSight™ celebrates 1 MILLION downloads! — Yes you read it correct, recently there was 1 millionth download for DraftSight™ and the number is still increasing.

To celebrate this milestone and to recognize the users and Facebook fans – DraftSight™ team would like to invite you to visit their Facebook Fan page to participate in the DraftSight Trivia Contest that will run weekly through August 15th. A DraftSight trivia question will be delivered each week and the user that responds first with the correct answer will receive a DraftSight gift pack! Wow that’s cool…

DraftSight™  is a free* 2D CAD product that lets you create, edit and view your drawing files in Windows®, Mac®, and Linux®.


*Standalone license. Activation required.

Display Mass in Dual Units in SolidWorks

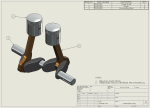
Mission: Have the Mass in two different units

Ingredients  Required: A part,  an equation, a conversion factor, file properties, some notes and a drawing with a view (optional).

1. Open the Part.

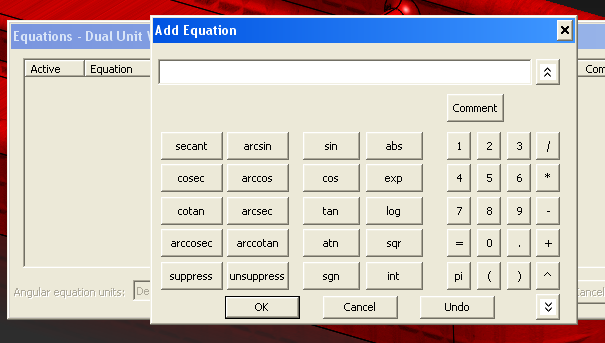
2. Right click on the Equation folder in the Feature manger tree and select “Add Equation“.

3. Equation editor will open up along with the Add equation dialog box.

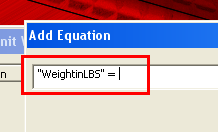
4. Type: “Weightin LBS” =

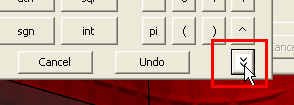
5. Now expand the add equation dialog box.

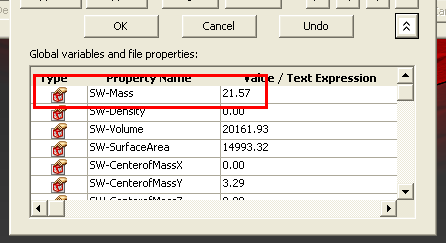
6. Click on SW-Mass property once.

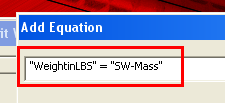
7.  “SW-Mass” will get added to the equation and equation will now change to “Weightin LBS” = “SW-Mass”

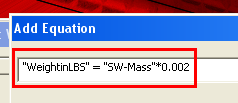
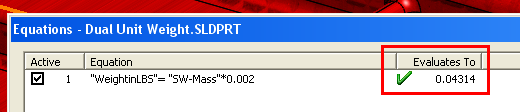
8. Add the conversion/multiplication factor. In this case, I have taken it as 0.002. The equation is now “Weightin LBS” = “SW-Mass”*0.002

9. Click OK to close the Add equation dialog box.

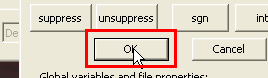
10. You can see the evaluated value in the Equation editor.

11. Click OK to close the Equation editor.

12. The equation will appear under Equation folder.

13. Open up part summary information (File > Properties)

14. Click on either custom or configuration tab as required.

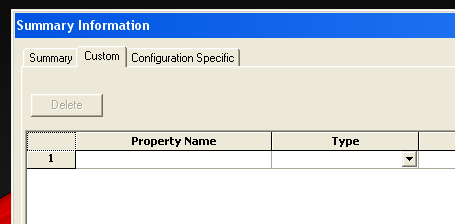
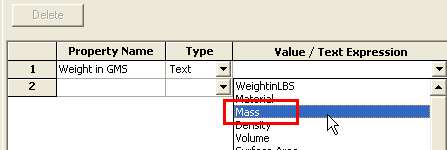
15. Start a new property. Type Weight in GMS under property name. Set type to Text. For value/Text Expressions, choose Mass from the drop down list.

16. You can see the evaluated value for the property.

17. Create another property. Type Weight in LBS under property name. Set type to Text. For value/Text Expressions, choose Weightin LBS from the drop down list.

18. You can see the evaluated value for the property.

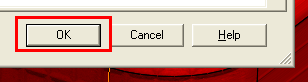
19. Click OK to close the summary information window.

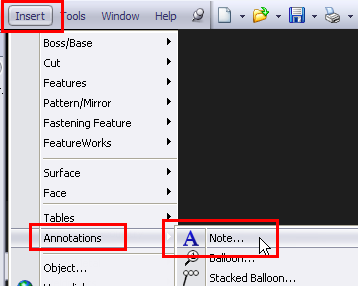
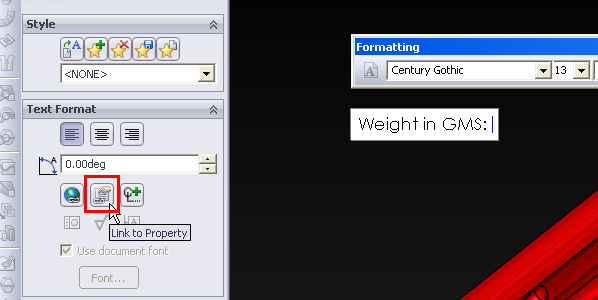
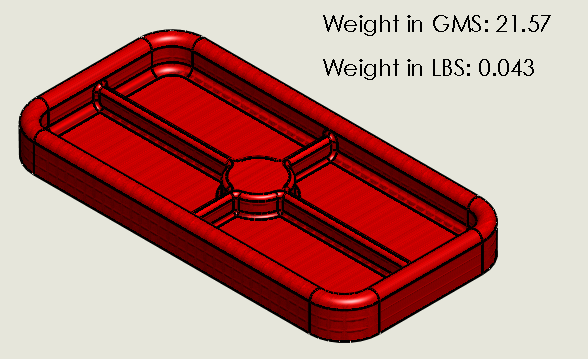
20. Start a Note (Insert > Annotations > Note).

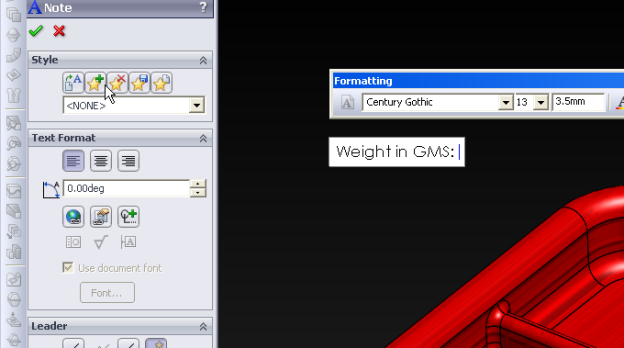
21. Click anywhere on the screen and type Weight in GMS:

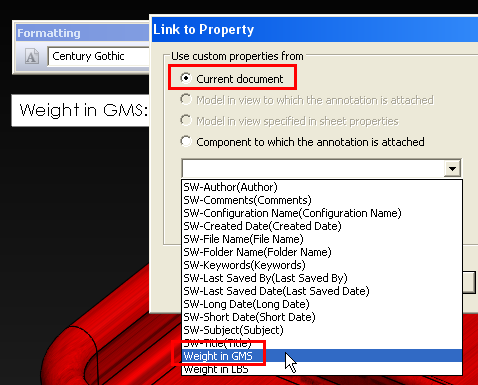
22. Now click on “Link to Property” in the note property manager.

23. In the Link to Property window, select current document and select Weight in GMS from the list.

24. Click OK to set the text.

25. In the same note, in the next line type Weight in LBS:, click on “Link to Property” in the note property manager and in the Link to Property window, select current document and select Weight in LBS from the list.

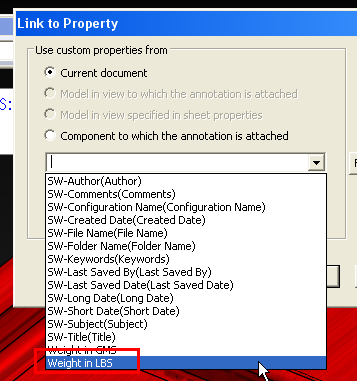
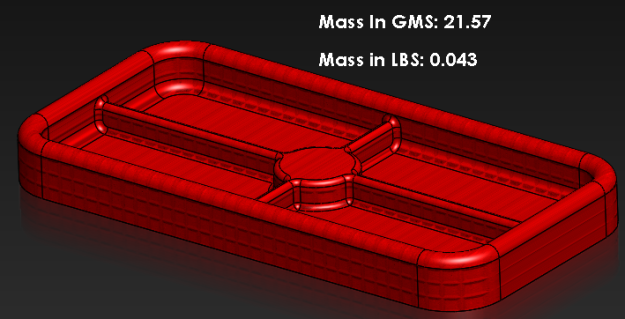
26. Click OK to set the text.

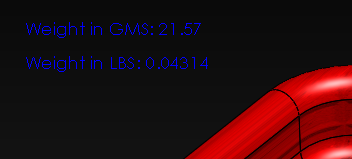
27. Click anywhere on the screen to exit the command. You can now the see the weight displayed in two different units.

28. Similar way you can set to display the weight  in two different units in drawings too.

I leaned a new thing while working on this post for which I would like to thank Wayne Matus. He taught me a method to set decimal places in equation. I had been struggling to control the decimal place in the evaluated value but no option to do that. So I throw up up the question to SW experts and Wayne came down bang on the answer with the simple method stated below.

1. Expand the Equation folder in the Feature manger tree, right click on the equation we just added above (i.e. “Weightin LBS”) and select Edit equation.

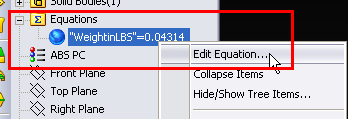
2. Edit equation dialog box will open up.

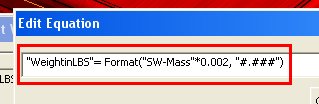
3. Equations use VBA so the Format command can be used with them.  Change the equation to : “WeightinLBS”= Format(“SW-Mass”*0.002, “#.###”) Just specify the nujmber of # after the . In my case, I have set it to 3.

4. Click OK to close the Edit equation dialog box.

5. You can see the updated evaluated value in the Equation editor.

6. Click OK to close the Equation editor.

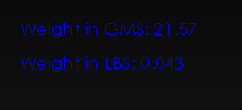
7. And finally the updated Note in the part.

Making your Drawing Sheets Party together

Do you ever move your sheets from one drawing to another or combine several drawings into one. Let’s play a game to move sheet from one drawing and make it party with other drawing.

You can download the files from here.

1. Open all the drawing files.

2. You may arrange them  (by clicking on Windows menu and setting Vertically or Horizontally)  so that you can select quickly.

3. Now activate the drawing from which you want to copy the sheet.Right click on the sheet in the sheet tab or in feature manager and select COPY.

4. Now activate the drawing in which you want to copy the sheet. Right click on the sheet in the sheet tab or in feature manager and select PASTE.

5. Set the position as required.

6. You can see the sheet copied over to the selected position.

7. Similarly you can do for other sheets if required.

8. You may rename the sheets. Right click on the sheet in the sheet tab, select rename and set the new name OR right click on the sheet in feature manager and select Properties OR right click anywhere on the sheet and select properties. In the pop window, set the new name.

Changing Context Toolbar options in SolidWorks

Context Toolbars

The context toolbar started their career with SolidWorks 2008 version. When you select items in the graphics area or Feature Manager design tree, context toolbars appear and provide access to frequently performed actions for that context. The tools in the context toolbar are a subset of items previously found on the shortcut menus.

(above pictures taken from SolidWorks online Help files)

I’m liking the feature from it debut entry and many more like me love it.  And if you’re one of those who are getting used to it, you can change the setting to get the older behavior of menus in the drop down list.

To set it up

1. Open a part, assembly, or drawing document.

2. Click Tools > Customize, OR right-click on any toolbar and select Customize OR right-click at the top or bottom of the window and select Customize OR click Options > Customize.


3. On the Toolbars tab, uncheck  Show in shortcut menu under the Context toolbar settings.

4. Click OK and enjoy the old settings/options.

DraftSight™ jumps to Beta II for MAC®

Dassault Systèmes releases the free* beta II version of DraftSight™ for the MAC® users. DraftSight™, a free* 2D CAD product that lets you create, edit and view your drawing files in MAC®.

Beta I already available for MAC® (expiring on November 30, 2011) has been replaced by Beta II which extends the expiration into 2012.  Though the download link of DraftSight™ MAC® displays Beta I but Beta II will get downloaded. The software is also available for Microsoft® Windows XP®, Windows Vista®, Windows® 7, and Linux®(beta).

Need to know more, then check DraftSight™ Getting Started Guide

Join the DraftSight™ Community to share your views and discuss your issues.


*Standalone license. Activation required.

Open your DWG files in Linux® with DraftSight™ Beta

Dassault Systèmes offers the free* beta version of DraftSight™ for the Linux® users.

Earlier available for Microsoft® Windows XP®, Windows Vista®, Windows® 7, Mac® OS X (10.5.8 or above), now you can open/edit drawing (DWG) files on your Linux®.

DraftSight™, a free* 2D CAD product that lets you create, edit and view your DWG files is available in  both .deb and .rpm packages for Linux®.


Need to know more, then check DraftSight™ Getting Started Guide

Join the DraftSight™ Community to share your views and discuss your issues.


*Standalone license. Activation required.

Making your Drawing Tables Jump in SolidWorks

This particular topic comes often in various SolidWorks forums that “Can the Tables be moved to another sheets in a Drawing“. The answer is simply Yes and there are various ways to move them to different sheet.

Let’s check the various tables used in SolidWorks first:

In this post, I will be trying to discuss various ways using which one can move these tables to different sheet in a drawing.  You can use any of the methods below to move the table onto other sheet. I have used BOM table to explain these methods and some of the methods explained below might not work on all types of tables.

Cut and paste Method

1. Click on the table you want to move (in the drawing area).

2. Press Ctrl + X (cut) on the keyboard or Edit > Cut.

3. Activate the sheet you want to move the table onto by right clicking on it in the manager tree and select Activate or click on it in the sheet tab.

4. Press Ctrl + V (paste) on the keyboard or Edit > Paste.

5. Your table is now on new sheet, you can set its position as required.

Drag Table Method-1

1. Select the table you want to move from manager tree by clicking on it.

2. With the table selected, keep the left mouse button pressed and drag the table below the sheet name on which you want to move the table onto.  Pay attention to change in pointer when you do that.

3. Your table is now on new sheet, you can set its position as required.

Drag Table Method-2

1. Click on the table you want to move (in the drawing area).

2. With the table selected, take your pointer to the cross (refer picture).

3. Keep the left mouse button pressed and drag the table on the sheet name (in the sheet tab area) on which you want to move the table onto.  Pay attention to change in pointer when you do that.

4. Your table is now on new sheet, you can set its position as required.

DraftSight™ (Free CAD software) is here!!

Looking for a quick solution for your drawing (DWG) files, then look at the new FREE* solution offered by Dassault Systèmes

DraftSight™ is a professional-grade, open 2D CAD product for users who want a better way to create, edit and view DWG files. DraftSight is easy to use and is available for professional CAD users, students and educators to download and activate for free*. It had been in beta stage so far but now has been released as for general public use and best thing is that it is free* to download and use

Based on an advanced architecture, DraftSight™ has a small footprint, should take a few minutes to download, and supports Microsoft® Windows XP®, Windows Vista®, Windows® 7, Mac® OS X (10.5.8 or above). (Linux® coming soon).

Need to know more, then check DraftSight™ Getting Started Guide

Join the DraftSight™ Community to share your views and discuss your issues.

If you work for an organization that needs five or more DraftSight™ licenses then you consider the Premium Pack that includes a network license, API, telephone and email support.  For more information, send an email to Premium(at)draftsight.com. Specifically designed for educators, the Education Premium Service includes curriculum materials, network licensing and telephone and email support.  For more information contact your local reseller.


*Standalone license. Activation required.