Tag Archives: Spring Animation

HOW TO ANIMATE A SPRING -2

Sorry for keeping this one longer. There was some other work going on which kept me away from putting this one up but I’m happy to have this one now..

To start you will the spring file you created in the last chapter i.e. HOW TO ANIMATE A SPRING -1.

1. Open the spring part file.

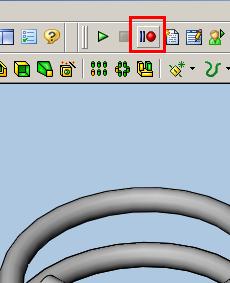
2. Click on the Record button on the macro tool bar. If you haven’t have the macro toolbar one, you can go to Tools > Macros > Record to start recording. To show the macro toolbar go to View > Toolbar > Macro.
as31

3. Double click on the spring body to show the dimensions and then click on the length, 100 mm in this case if you used the same old spring part file.

4. In the pop up window change the value to anything > I have changed it to 110 mm.

5. Click on Rebuild in the same dimension box or from the toolbar.

6. Finally click Stop on the macro toolbar or Tools > Macros > Stop.

7. Give a name your macro and hit save. I have used Spring Animate.

8. Now click on Edit button on macro toolbar or Tools > Macros > Edit

9. Browse to the macro you saved in the step 7 and open it.

10. VB editor will get open up and your screen will look like this.

11. Remove the extra line and make your window look like this.

12. Copy these 3 highlighted lines and paste them.

13. The editor window will look like this. Change the system value to .1. The system takes all in puts in meter. So if you want any other value convert it to meter and put here. .1 denotes .1 m i.e. 100mm

14. Add these 4 lines as shown and save you macro. You can keep any value for “i”. In this case I have used 10 which means the macro will run for 10 times. You can give any value or can create an input box where user can put the number of steps he needs. I will put up a macro or tutorial on how to do that.

15. Close the VB editor and back to SolidWorks window. Click on Play button on macro toolbar or Tools > Macros > Play

16. Browse to the macro you edited and saved in step 14.

17. Now sit back and enjoy the animation.

Apart from using macro, I have been trying to use Phil Sluder’s trick (SW Tips/Tricks – July Issue Adding Logic to Equations) but getting some error. I have requested Phil to check the same. As soon as he fixes as where I’m going wrong, we can have animation of spring using equations too. I’m also going to put another one using a combination of equations and Animator.
Link for the macro used in this tutorial: Spring Animate.swp

HOW TO ANIMATE A SPRING -1

Quite many time people have been asking me as how I have done the spring animation or can we animate spring in SolidWorks. The answer is yes and here is the trick. I have used SW07 to show “How to Animate a Spring”.

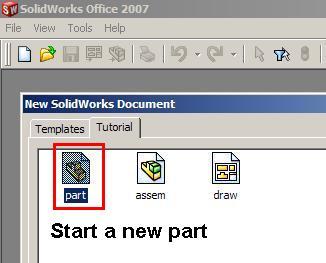
1) Start a new part (can be either mm or inch).
AS1
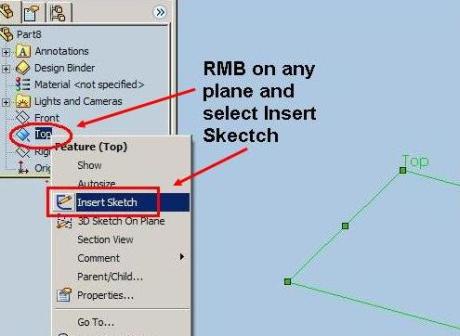
2) RMB on the top plane or any plane and choose “Insert Sketch” from the pop up window. You can also select plane and click “Insert Sketch” from the tool bar or menu.
AS2
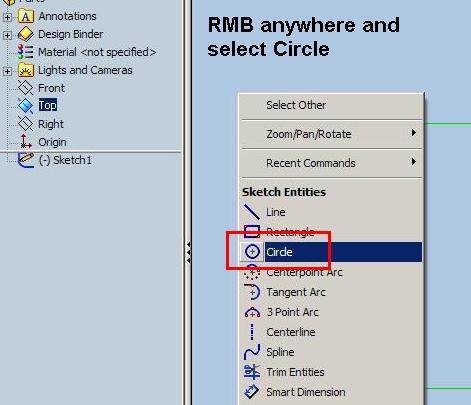
3) RMB anywhere in the graphic area and select circle from the list. You can also select circle from the sketch tool bar or menu.
AS3

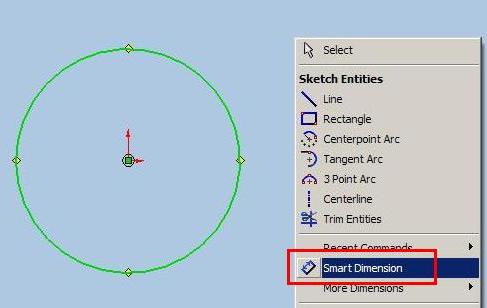
4) After you have drawn the circle RMB anywhere in the graphic area and select Smart dimension.

AS4

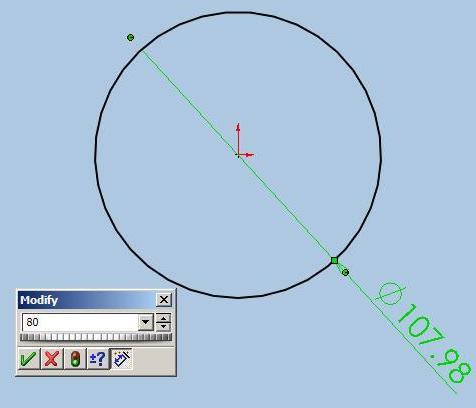
5) Dimension your circle. It is always a good practice to use fully defined sketches. You can give any value, I have used 80mm.

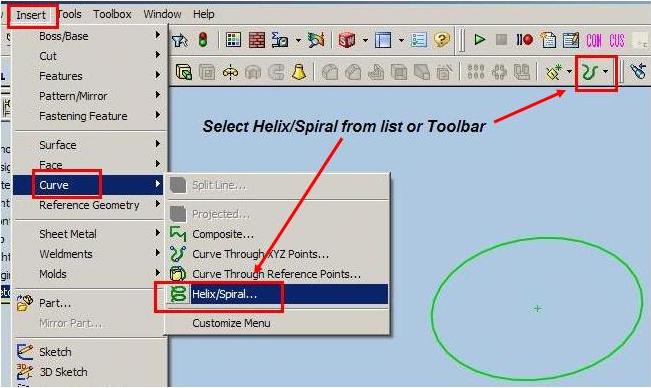
6) Exit sketch. Now with your sketch selected or you can select it later, go to Insert > Curve and select Helix/Spiral. You can select the same from feature toolbar.

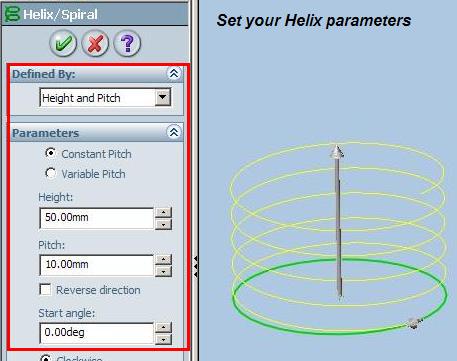
7) Set your parameter in the Helix/Spiral Property Manger. I have used Defined by: Height and Pitch. Parameter: Constant Pitch. Height: 50 mm. Pitch: 10mm and Start Angle: 0 deg.

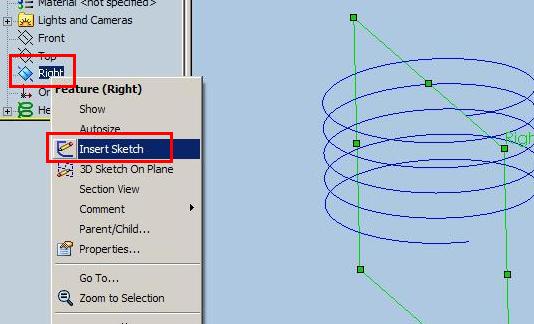
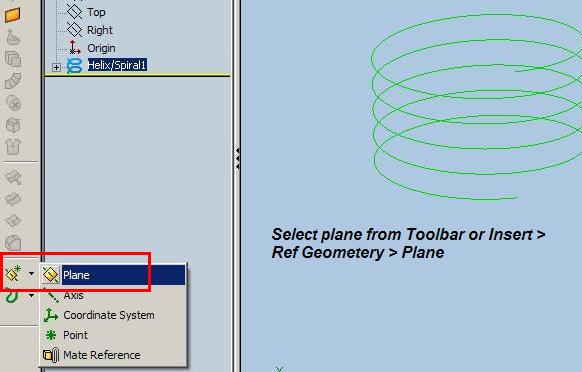
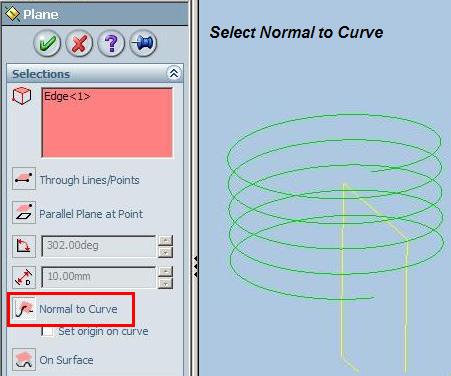
8 ) Click OK and exit the Helix/Spiral command. Now RMB on right plane and select Insert sketch. You can create a new plane if you set any other value to the start angel. Select Plane from the tool bar or from the menu list and then select the Helix or vice versa. In the plane menu select the option “Normal to Curve” if it is not selected by default. Now start a new sketch on the new plane.

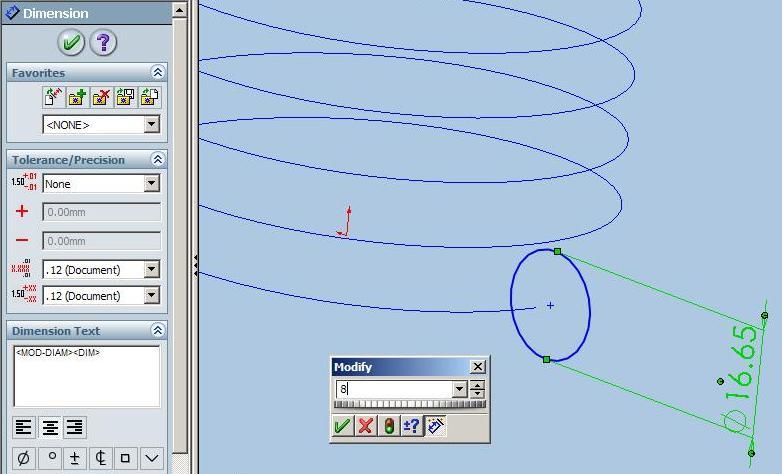
9) Draw a circle and dimension it. I have set the value to 8mm.

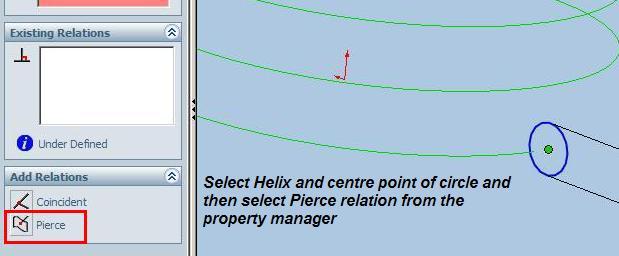
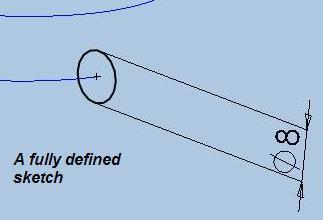
10) Select the center point of the circle and CTRL select the helix i.e. press CTRL for selecting the Helix. In the property manger select the Pierce relation to fully define the sketch. The black color indicates a fully defined sketch.

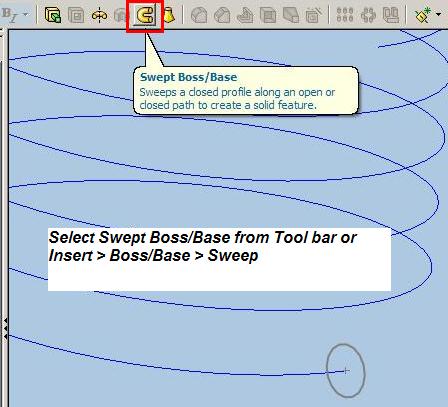
11) Select Swept Bose/Base command from the toolbar or got to Insert > Bose/Base > Sweep.

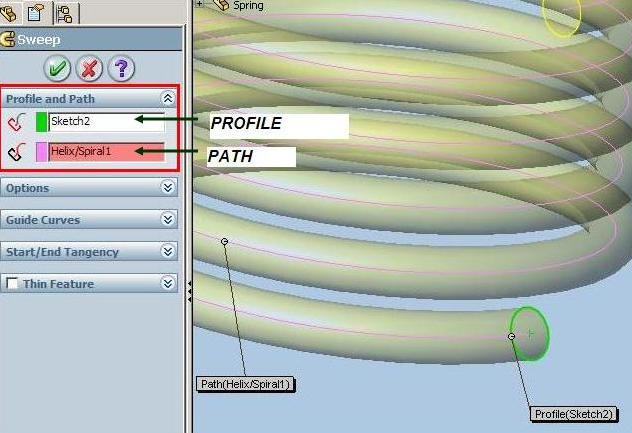
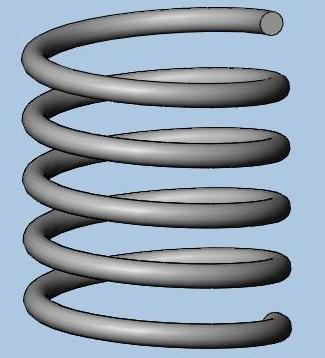
12) In the property manager, select the circle as the profile and helix as the path and click OK. Your spring is ready.

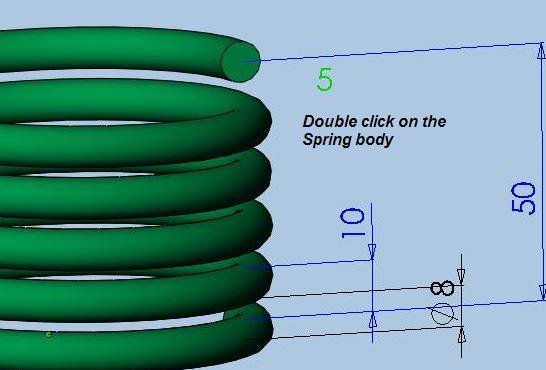
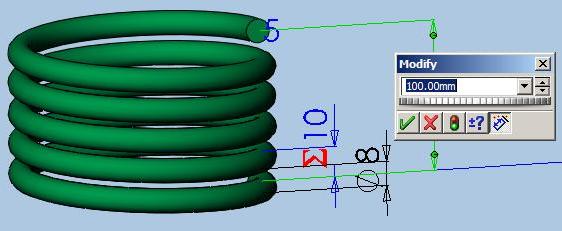
13) Now double click on the spring to see the helix dimensions.

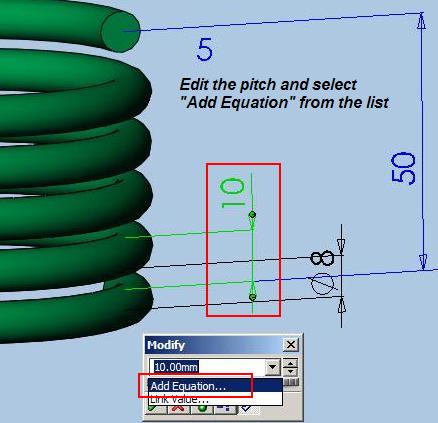
14) Double click on the pitch dimension (10 mm in this case) to edit it. In the pop up window click on the arrow next to dimension and select “Add Equation” from the list.

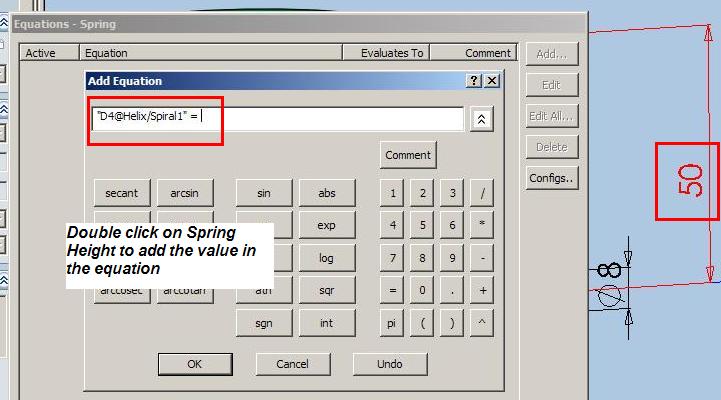
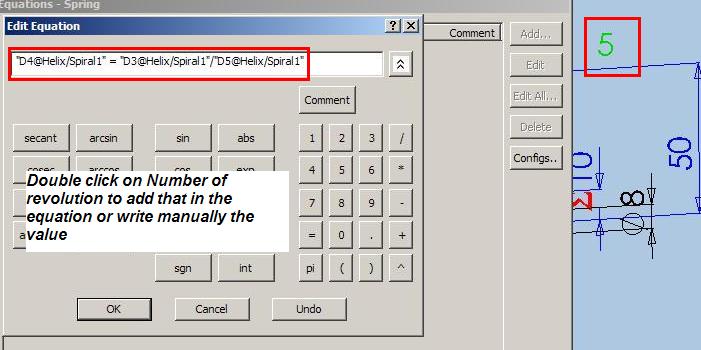
15) You will see the equation manger with pitch dimension (D4@Helix/Spiral1) on the left side followed by = sign. Now click one on the Spring Height (50mm in this case i.e. D3@Helix/Spiral1).

16) After clicking on the Height the equation will look like “D4@Helix/Spiral1” = “D3@Helix/Spiral1”. Put a / after “D3@Helix/Spiral1” and either manually give the number of revolution or select the number of revolution (5 in the case i.e. “D5@Helix/Spiral1”).

17) Try changing the height and do a rebuild. You will see the pitch changing.

Perfect, you have completed the first/main part for animating the spring.

Link for the part: Spring.sldprt